Sending messages by email matters a lot at work and home. Some folks lean on Office 365 to handle those messages, along with appointments, people details, files attached here and there. As days pass, these accounts fill up – contracts settle in, bills stack, talks with customers linger, private papers stay put, official stuff piles up. That buildup means one thing clearly: saving copies somewhere safe makes sense, especially when depending solely on online storage feels risky.
Still, saving Office 365 emails locally can matter when connectivity fails. Imagine keeping messages safe just in case something goes wrong later. Backups help meet rules that demand records stay preserved. Moving data to a different system works better with files saved outside the cloud. Internet troubles won’t block access if copies exist on your device. Account vanishes after a hacked password could leave you empty-handed. Subscription lapses sometimes lock users out unexpectedly. Company decisions might remove mailbox privileges overnight. Server crashes happen – rare but real. Without local duplicates, lost mail stays gone forever. Attachments disappear too, along with any hidden details inside.
Even when the web is down, having Office 365 emails saved locally means you won’t lose access. Stored versions take up less space in your inbox, which often makes Outlook run smoother. These backups stay put on your machine, a portable hard drive, or another protected spot – ready whenever needed.
One way to keep Office 365 emails offline is through Outlook, which lets you create PST file copies. Saving messages as individual PDFs works well when only a handful need preserving. For larger sets of data, the built-in archive option steps in quietly. Specialized backup software handles full mailbox transfers, often running tasks without constant oversight. Depending on volume – single items or complete accounts – one approach fits better than others. Some solutions even repeat actions at set times, while simpler ones require manual effort each time.
Here’s how to keep Office 365 emails saved outside the cloud. One path involves exporting files directly, while another leans on third-party tools instead. Saving locally means access without internet, yet setup time varies depending on volume. Some ways protect data better but demand more steps along the way. Speed might be high at first, though long-term upkeep could slow things down later. Each approach works differently under pressure, especially when handling large folders. Safety depends heavily on where copies land, not just how fast they get there. Pick what fits your routine once you see how effort matches outcome.
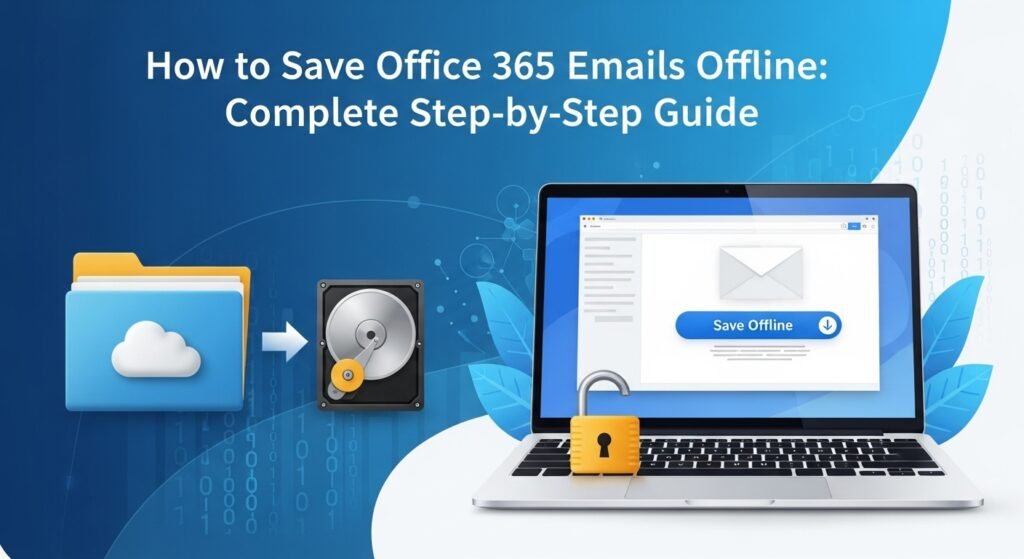
Why You Should Save Office 365 Emails Offline
Knowing how to save Office 365 emails begins with knowing why it matters. Cloud storage feels safe, yet data vanishes more easily than most expect. Though Microsoft offers built-in safeguards, these do little when someone deletes a message by mistake. Sync problems sometimes wipe folders without warning. Even emptying trash isn’t the end – items linger briefly before disappearing for good. Subscriptions lapse, leaving accounts unreachable overnight. Hackers gain entry, locking owners out despite precautions. Company rules shift, wiping user access regardless of need. Admins make changes too, removing mailboxes during reorganizations. Protection in the cloud exists, but it has limits nobody should ignore.
Keeping copies of Office 365 emails saved locally means critical messages, files, people info, and mailbox contents stay safe. For companies, these messages usually hold agreements, bills, customer talks, job specifics, legal records – so protection matters. If lost, the fallout might hit operations hard, bring money trouble, even spark legal issues.
Offices sometimes need to keep copies of Office 365 messages away from live systems just to follow rules. Because laws demand it, sectors like banking, hospitals, law firms, or public agencies save these messages long term. Having files stored outside the main system means teams can find old info fast if something goes missing.
Keeping copies of emails on your computer brings useful benefits. When the web goes down, you still get to read messages. Important ones can live safely on a flash drive, old-school hard disk, or locked-away folder. If something vanishes online, having a copy nearby means nothing truly disappears. Moving jobs or switching services? Those saved letters shift smoothly too. Less clutter inside your inbox often makes the app run faster. Files sitting close by tend to open quicker than those pulled from distant servers.
Most companies save copies of their Office 365 messages onto physical drives or shared folders to stay protected when something goes wrong. When problems hit – like hacking, broken systems, deleted items, or login troubles – these saved versions make it possible to bring back lost information without long delays.
Because of this, try saving Office 365 mailbox contents as PST files every so often – or just keep key messages on your device. Backups made now and then help people and teams hold onto their data safely, store it longer, pull it back fast when something happens.
Method 1: Export Office 365 Mailbox to PST File
Saving Office 365 emails offline often works best by turning them into a PST file. Not many formats hold everything quite like a Personal Storage Table does – emails show up just as they did before. Instead of staying online, messages, along with calendars and contacts, settle neatly inside one accessible spot. Outlook reads these files naturally, so opening old conversations feels no different than live viewing. Since the data lives locally, network issues won’t stop someone from checking saved items later. Even when disconnected completely, every attachment or note remains reachable through desktop software. Storing this kind of file on an external drive gives extra peace of mind against system crashes. Over time, it becomes easier to manage years of correspondence without logging in anywhere. No cloud needed once the transfer finishes – it simply waits until someone decides to open it again. Eventually, revisiting archived work requires nothing more than double-clicking what’s already there.
A single file holds everything when this approach gets applied, favored by tech teams and businesses alike. Entire folders move out fast – no clicking through messages individually – thanks to PST exports doing heavy lifting. Complete mailboxes shift smoothly, which suits firms keeping logs for audits, transitions, or rules. Full copies stay ready just in case something goes wrong later.
When staff depart, shifting away from Office 365 makes sense. Moving mailboxes into PST format helps during transitions to different systems. Freeing up online storage often leads people to save messages locally instead of removing them. That saved file sticks around – ready to open years later if something gets needed again. Long-term access stays possible through that single archived container.
One solid way to save Outlook emails from Office 365 onto an external drive is by creating a PST file. Once it’s ready, move that file to a USB stick, outside hard disk, or online storage space – keeps things safer. Protection kicks in when something goes wrong: maybe the account locks out, or messages vanish by mistake. Files on the drive stay put, untouched by glitches above ground. Even if the digital sky falls, those copies remain.
Steps to Export Office 365 Emails to PST
Follow these steps to export your Office 365 mailbox to a PST file and save it offline:
Open the Outlook Desktop Application
Open the Microsoft Outlook app on your PC first. Sign into your Office 365 account if you haven’t already. Wait until every folder in your mailbox finishes syncing with the server. That way, your most recent messages, people you know, and scheduled events will be part of the export. Then again, nothing gets left behind when everything is up to date.
Start by selecting File up at the top of the screen
Over in Outlook’s upper left, tap File to get started. That move slides open the Backstage area. Inside, tools like account setup, data transfer choices, and deeper controls come into view. From there, everything just waits for your next step.
Select “Open & Export”
Over on the left, click Open & Export. Inside here, you will find ways to bring in, send out, or access your Outlook data files.
Click “Import/Export”
Over by Open & Export, choose Import/Export. The wizard appears – walking you step by step through shifting data into or out of Outlook.
Start by picking “Export to a file,” then move forward with Next. Go ahead after selecting that option, proceed using the button marked next
Start by picking “Export to a file” inside the setup guide. That choice saves your mailbox information into a single document. Moving forward? Hit Next when ready.
Choose the option labeled Outlook Data File (.pst). After that, press Next
Pick an Outlook Data File (.pst) when asked about file type. These files? They hold emails, contacts, calendars – basically everything inside your mailbox. Standard setup. Move forward by clicking Next. Done.
Pick any mailbox or folder you wish to export. Choose the one that fits your needs right now
Pick which mailbox or folder to save – maybe just one, maybe more. Suppose you go for the full account: that covers Inbox, Sent Items, plus Contacts and Calendar, even smaller folders tucked inside. Tick the box marked Include subfolders when the goal is pulling every bit down below a main folder.
Save the PST file where you want it stored
Start by hitting Browse to pick a spot on your machine for the PST file. Another option – type a new name so you know what it is later. Try placing it somewhere safe but simple to reach, maybe inside a folder just for backup copies.
Once done, press Finish to begin exporting
After you set everything up, press Finish. The export kicks off when Outlook starts saving the chosen mailbox into a PST file. Time needed? It depends on how big the mailbox is – could be under ten minutes or stretch past sixty.
Maybe include a password if you want more protection
If asked, choose a password for the PST file to keep information secure. While not required, it makes sense when saving to drives others might access.
Move the PST File for Additional Backup
Once exporting finishes, the PST lands on your machine. From there, transfer it to a flash stick, outside disk, or locked online vault – extra safety doesn’t hurt. Losing access to Office 365 won’t matter much when messages are tucked away elsewhere. Safety lives in copies, not originals.
A single PST file holds everything – emails, attachments, contacts, calendar entries – all pulled straight from Office 365. This method remains a top choice for saving mailboxes safely outside the cloud. Later access or full restoration becomes straightforward when needed.
Method 2: Save Office 365 Emails as PDF
When just a few messages matter, try turning Office 365 emails into PDFs instead of exporting everything. Because single items often hold real value – like bills, agreements, or official notes – this way keeps them safe one by one. Files saved like this open anywhere, even on devices missing Outlook or online access, since PDF works across systems. While full backups use PSTs to grab whole accounts, focusing on separate records brings simpler control. Important exchanges stay locked in place through storms, job shifts, or software changes thanks to their stable layout.
A single click turns an email into a tidy PDF. Sharing with coworkers feels smoother when the format stays fixed. Clients get clean copies without odd formatting jumps. Need hard proof later? Print one off anytime. Rules often demand saved messages – PDFs fit that need neatly. Tucked inside reports or folders, they stick where you put them. Unlike raw email files, these snapshots resist changes by mistake. Security lifts slightly when edits can’t sneak through. Porting them across devices works every time. Stability matters most when details must stay exact.
Saving Office 365 Emails as PDF
Start up Outlook. Pick an email you wish to keep. Open the Outlook app on your computer, then go to the message you want to keep. Wait until everything shows up clearly before moving forward – this means text, images, even files attached inside the email need time to load completely. Only when it looks just right should you think about saving it as a PDF.
Start by pressing File – then choose Print
Start by opening the menu at the top labeled File inside the email screen. Next, pick Print from what appears below it. A new panel shows up now – this is where choices about saving the message appear. Settings here decide how your copy gets stored.
Pick Microsoft Print to PDF when selecting a printer
Choose Microsoft Print to PDF from the printer options shown. That choice turns your email into a PDF rather than printing on paper.
Click “Print”
Choose Microsoft Print to PDF first – then press Print. Not a real print job, just tells Outlook to create a PDF copy of the email instead.
Pick where you want it saved on your machine before storing the file. Place matters when the document gets written down
A new box pops up, showing where the PDF goes. Pick a spot on your device, type a clear name – maybe the email title or when it was sent – then press Save. Another option: make one special folder just for these email files, so things stay neat later.
Access Your Saved Email Offline
Saved offline, the email lives now as a PDF. Open it whenever you like – any PDF reader works, including Adobe Acrobat Reader – even when there is no internet or Outlook around. Best used for keeping just one or two key messages close at hand, skipping the need to pull out a whole mailbox.
Start saving single Office 365 messages by turning them into files that travel well, stay safe, work almost anywhere. Happens fast – good move when mail needs extra care, proof later, passing along without fuss.
Method 3: Download Emails from Office 365 Webmail
When accessing Outlook through a browser rather than the desktop version, saving messages to your device remains possible. One way to handle single emails is exporting them as EML files – these work across multiple programs like Thunderbird, Windows Mail, and Outlook itself. Even without Outlook set up locally, pulling emails into EML form helps store key messages right on your machine. Keeping copies this way supports offline review, organization, or passing along content when needed.
Grabbing emails straight from the browser works without extra apps. Since you skip installation steps, it fits quick tasks well. One message at a time can be saved easily this way. Whole account exports aren’t needed when only certain mails matter. Handy if you just want to keep particular threads aside. No complex tools involved – just open, select, save. Useful for storing single conversations long term. The process stays light and focused on small jobs.
Download emails from office 365 webmail
Log in to Office 365 Outlook Web. Start by launching a web browser, then head over to the Office 365 Outlook website. Once there, log in using your account details for Office 365. Check that you can open the mailbox where the message you need is stored.
Open the Email You Want to Download
Start by opening your inbox – or any folder where messages live – and find the one email worth keeping. Once there, tap it to pull up everything inside. Wait until every piece shows clearly, attachments included, before moving on.
Tap the three dots to open extra options
A small icon with three dots sits in the upper right once you open a message. From there, extra tools appear – useful when handling messages differently matters. One choice lets you save the email directly to your device, among others listed.
Select “Download Message”
Start by picking “Download message” from the list that appears. That choice saves the email as an EML file – keeping every part of it intact, like headers, body text, plus any files attached. The format holds everything just as it arrived.
Put the file on your computer instead
Pick a spot on your computer when asked, somewhere you’ll remember. Name the file something clear – maybe the topic of the message or when it arrived. Hit Save once ready, that finishes pulling it down.
Your saved email can be reached without an internet connection
Saved right there on your device, the message lives now as an EML file. Later on, launch it through Outlook, maybe Thunderbird, perhaps Windows Mail – really most programs handle EMLs just fine. No online link needed anymore, nor a login to Office 365, because everything’s ready when you are.
One way to grab just a handful of key messages fast skips the need for Outlook Desktop entirely. Another benefit? Storing messages securely for legal needs, work tasks, or private files right on your computer. With this approach, access stays close at hand, tucked neatly into folders you control. No extra software stands in the way – just straight saving where it matters most. Important notes land safely offline, ready whenever they’re needed later.
Method 4: Enable Offline Access in Outlook (Cached Mode)
When you turn on Cached Exchange Mode in the Outlook desktop app, it gives you another path to reach emails without being online. Your mailbox gets saved right onto the machine, kept up to date behind the scenes. Without any web link at hand, reading, searching, or drafting messages still works just fine from that local version. Actions taken during downtime – like answering mail or shifting items around – are quietly matched up with the server once connectivity returns.
When you move around a lot, staying online can be tricky. Outlook loads messages quicker when it does not reach out every single time. People with big folders notice things run smoother. Instead of pulling everything live, it keeps a copy close. Spotty networks become less of a problem. It works better because less travels back and forth. Opening your inbox feels faster most days. The system leans on local storage more than before. Heavy email users see fewer delays now. Every trip to the server drops when possible.
Enable Cached Exchange Mode
Open the Outlook program on your PC first thing. Check that your Office 365 email shows up inside it before moving forward.
Click “File”
Start up near the upper left of Outlook by tapping File. That brings you into a space behind the scenes – account tools live there now.
Navigate to Account Settings instead
Start by opening the File menu. Choose Account Settings from there – next, pick it once more when it appears in the list. A new window pops up showing every email account set up in Outlook.
Tap twice on your Office 365 profile
Start by finding your Office 365 account in the list – give it a double-click to move forward. The mailbox settings will appear once you do that.
Enable “Use Cached Exchange Mode”
Open the account settings window, then tick the option labeled Use Cached Exchange Mode. The quantity of mailbox information stored locally might be changed – perhaps set to one year’s worth or every message – to match available space and personal preference.
Restart Outlook
Outlook needs a fresh start to save what changed. Once it opens again, your mailbox begins copying to the device – this means email works without connection. How fast it loads depends on how big the data is, also how quick the network runs. Time passes before everything shows up.
Important Note:
Even though Cached Exchange Mode lets you access messages without internet, counting on it for safety isn’t wise. That stored version lives on your machine – handy when online, faster during use. Lose the device, have hardware break down, or face theft? Those saved items might vanish along with it. To truly protect correspondence and keep data longer, shift mailboxes out of Office 365 into PST files – or pick separate tools built just for preserving information.
Best Way to Backup Office 365 Emails Offline

Offline storage for Office 365 emails comes in several forms, yet the right pick hinges on what exactly you need to keep plus how you intend to access it later. One approach might suit bulk archiving while another works better for quick retrieval. Some options allow broad search features, others limit navigation once saved. The format you choose shapes future usability just as much as the tool itself.
A single copy of everything inside your mailbox lands safely in a PST when you choose export. That file holds messages, attached files, appointments, personal details – all there, waiting. Because it keeps every piece intact, saving as PST makes sense if moving data across devices or accounts. Need records for rules or court? This way covers those needs too. Even offline, Outlook pulls up these files whenever required.
Sometimes keeping just a few emails matters more than saving everything. A single message turned into a file can travel across devices without hassle. That format opens on nearly any machine, no extra software needed. Storing one note like this makes it easier to hand over when required. Paper copies come out clean, every time, if printing becomes necessary. Certain records – like agreements or payments – belong in separate slots. Each locked page stays unchanged, safe from edits by accident or intent. Digital paper holds dates, names, numbers exactly as they were sent. Important notes live longer when handled this way instead of left inside an inbox.
Got mail online? Saving it as an EML might help. These files keep everything – text, details, attached stuff too. Open them later in Outlook or similar programs. Skipping the desktop app altogether works fine this way. One message at a time adds up quietly.
When Outlook uses Cached Exchange Mode, a copy of your mailbox lives on your computer. That means email stays available even with no network connection. Performance often feels smoother because data loads nearby instead of across the web. Losing the machine might mean losing that stored information too. It acts like a mirror – helpful day to day but not safekeeping. Think of it as temporary access, not protection against hardware trouble.
Every now and then, companies save copies of Office 365 email folders onto nearby drives or shared networks. These routine saves aim at keeping data secure while meeting legal rules over time. With careful selection – sometimes mixing approaches – email records stay protected and reachable. A smart setup cuts down on losing messages by mistake.
Final Thoughts
Keeping email saved on your device helps guard what matters, keeps history intact, one way or another. Messages carry private details, work talks, agreements, bills – paperwork that might matter later, maybe years down the line. When connectivity fails, accounts vanish, subscriptions stop, mistakes happen, everything slips away without local backups. Access stays possible only if files exist beyond the cloud, sitting close, ready when needed.
This guide covered a few solid ways to save Office 365 emails locally, every one fitting a unique situation
One way to save everything – emails, files, people, dates – is by using PST export. Saved locally, that data stays safe even when offline. Think of it like a snapshot taken straight from Outlook. Later on, bringing it back into the app works smoothly. No connection needed once it is stored away. Everything fits inside one file, ready whenever required. This keeps all pieces together in case something goes wrong. Restoring feels natural because nothing gets left behind. Even big collections move easily between setups. It simply follows where you need it most.
Storing single messages? Try turning emails into PDFs. These files open on nearly any device, travel well between people, sometimes go straight to a printer. They settle nicely on hard drives, flash sticks, even remote online folders – ready when paperwork calls.
One way to save messages from Outlook online? Grab them as EML files. These hold everything – body, subject line, extras attached along the side. Opening later works fine in most mail programs, even without Outlook installed. Full details stay put, no extra steps needed. Works quietly behind the scenes when shifting between apps.
A copy of your mailbox sits right on the computer when you turn on Cached Exchange Mode in Outlook. That means email stays available even without an internet connection. Getting back to messages works fast since they come from nearby storage instead of online. Yet trouble hits if something goes wrong with the machine – everything saved there could vanish. Think twice before treating this setup like a safety net for long-term protection.
To keep your Office 365 emails truly safe, make it a habit to copy them now and then – using the PST export option works well. Instead of relying on one place only, save those copies onto something like an external hard disk or a USB stick tucked away securely. Even small mistakes, glitches, or digital attacks won’t touch your messages if they’re backed up this way. Protection grows stronger when stored outside the cloud too, so access stays possible even during outages. With steady copying plus physical storage steps taken, recovery becomes smooth when surprises hit.